Tampilkan postingan dengan label beaded. Tampilkan semua postingan

Selasa, 26 Maret 2013

, , , , , , , ,

Bohemian Beaded Colored Mason Jar Tutorial


In my last post, Colored Glass Mason Jar Tutorial, I demonstrated how to 
create extremely cool and stylish colored jars with Mod Podge and food coloring. 
Now, take it a step further and dress up those pretty jars with some wire
 and beads and turn them into beautiful Bohemian hanging jars...


First, gather your supplies.  
Here is what you will need:


Craft wire (I used 20g around the jar and 26 g for the beads)

Craft chain (I used jewelry chain) and Jump rings (5-6mm) 


A variety of coordinating beads


Jewelry pliers - any type, small


Directions for adding wire & chain hangers to the jars: 


1. Cut a 3 foot length of 20 gauge craft wire and wrap the wire around 
the rim of the jar below the lip. When you get to the end of the wire, 
twist it together with the beginning end of wire until both ends are 
secured together, and then snip off any excess wire. Tuck any pointy 
wire ends against the jar with a pair of pliers. 

(Note: if you are going to add beads to your jar, do this before adding the chain hangers)

2. Measure and cut four equal lengths of chain. I made each of mine 8 
inches long. Attach lengths of jewelry chain to the wire with jump rings. 


3. Gather together the four lose ends of chain and attach together 
with another jump ring or with a piece of wire and close. 


To decorate your jar with beads:


4. Now cut another long piece of thinner, 26g wire (long enough to wrap around 
the neck of the jar a few times) and do the same thing you did before, wrap the wire 
around the neck of the jar, but this time, first secure the beginning of your wire 
to the wire that you already wrapped around the jar. Now add beads to 
the wire as you go along. 


I strung about 4 to 5 inches of beads and then stopped and wrapped my wire 
around the existing wire to secure it, then I continued, adding another 5 inches 
or so of beads, then again stopped and wrapped the wire to secure it, then added
 more beads, and so on. When you get to the end of the wire, wrap it around 
the wraps and tuck in any pointy ends with a pair of pliers.


5. You can also use additional pieces of wire or headpins to 
create beaded drops and attach those to your jar. 


6. Now attach your chain hangers as described above in step 2.


That's it! Hang in a sunny window. 

You can use this as a candle holder, but do not put the candle directly 
into the jar. Instead, place a candle inside a glass votive and then place 
the votive inside the jar. Not made for holding food or water unless you
use some type of liner inside the jar. 


This was my inspiration photo...


What do you think?


This DIY copyright Laura Beth Love 2013


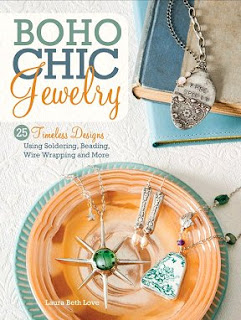
Check out my new Boho Chic jewelry book!


Jumat, 19 Oktober 2012

, , , , , , , ,

Free Spirit Bohemian Necklace


Free Spirit
(a Bohemian necklace by me) 


For this necklace I used rough Chrysocolla, blue Peruvian Opal, Larimar, a few vintage 
Czech glass beads, sterling silver wire, and a few lengths of sterling silver chain. 


Here is a brief tutorial walk-through of the process...


Freshwater pearls and sterling silver wire...


I wanted the ends of the wire (the wraps) to be flat so after I strung on the pearls I carefully...


...flattened the wire ends with a hammer. Carefully.


Lookin' good


Meanwhile... I couldn't wait to use these rough Chrysocolla beads. The colors are spectacular.


I cut a piece of copper to stamp on because I was out of silver sheet... Improvise! 


Flux.


Flood with silver solder. Lead free always. 


Nice and clean. Kinda looks like a stick of gum LOL


Using a hole punch. To punch a hole.
I also trimmed the corners to make them rounded.


Wouldn't you know, I got two letter M's and no H! LOL
Back to the store tomorrow to get my H. 


I first stamped this with 1/4" stamps but didn't like the way it turned out so I made
another one and used the smaller sized letter stamps instead...


 Makes me happy.


At the same time... 
beading, hammering, wire wrapping, and making some connections.
I work in no particular order or pattern (no math here, LOL) I just assemble

it together as I think it looks best. 


Wrap it around.


I cut two lengths of chain that will be on the clasp ends. This makes it more 
comfortable to wear... comfort is important! 


Almost finished....still too shiny...


Love those loopy wraps! Time to go into a Liver of Sulfur bath to get that antique finish...


Love the blackened silver...but still needs a polish to bring out some of the silver...


Much better! Love!


Finished! This is a longer necklace - Opera length, about 32 inches long.


I like the feel of this necklace...it's peaceful and powerful  :)


What do you think?


Kamis, 27 September 2012

, , , , , , ,

On My Workbench: Boho Amazonite Bracelet


A peek into my workshop...

Boho Amazonite Gemstone Bracelet


I was crazy about these small rectangular silver link findings and  faceted 
Amazonite rondelle beads. I love faceted rondelles!

I thought that together they'd make a nice combination. 
I like the way the blue-green Amazonite and the silver compliment each other. 


I decided to alternate them in a design and create a Boho style link bracelet. 

I cut 2" pieces of silver wire and using a simple wrapped loop technique, connected the beads and silver links together until I had the bracelet length that I wanted. 
Then I simply added a clasp, and it was finished!


I love the end result! 


What do you think?


Take a peek at my other workbench projects: